Tiling for Beginners: How to Tile a Kitchen Splashback in 5 Easy Steps

Tiling for Beginners: How to Tile a Kitchen Splashback in 5 Easy Steps
ScrewHero Podcast: Beginner’s Guide to Tiling a Kitchen Splashback
The text provides a comprehensive guide for beginners on how to tile a kitchen splashback. It starts by outlining the necessary tools and materials, then walks readers through five easy steps, including preparing the wall surface, applying adhesive, laying tiles, grouting, and cleaning.
The article also emphasizes the importance of proper preparation, patience, and seeking professional help when needed, ultimately empowering readers to achieve a professional-looking result.
Introduction
Tiling a kitchen splashback is one of the best ways to transform your space. Not only does it add a stylish focal point, but it also protects your walls from splashes and spills. Whether you’re a DIY enthusiast or a complete beginner, our 5 easy steps will guide you through the process of tiling your kitchen splashback like a pro.
With the right preparation, tools, and patience, you can achieve a professional-looking result that enhances your kitchen’s aesthetic and functionality. Let’s dive into the essentials of tiling your kitchen splashback.
Tools and Materials You’ll Need
Before starting your tiling project, gather all the essential tools and materials to ensure a smooth and efficient process.
Tools:
- Tile Cutter (Manual or Electric): For cutting tiles to the desired size.
- Tile Spacers: To maintain even spacing between tiles.
- Notched Trowel: Helps apply adhesive evenly on the wall.
- Grout Float: For spreading grout smoothly into the gaps between tiles.
- Spirit Level: Ensures your tiles are aligned perfectly.
- Sponge and Bucket: For cleaning excess grout and adhesive.
- Tape Measure: For accurate measurements of your wall and tiles.
- Pencil: For marking cut lines on tiles.
- Safety Gear: Gloves and safety glasses to protect your hands and eyes.
Materials:
- Tiles: Choose tiles that suit your kitchen’s style and are suitable for splashbacks.
- Tile Adhesive: To bond the tiles securely to the wall.
- Grout: Fills the gaps between tiles, available in various colors.
- Primer (if necessary): Prepares the wall surface for better adhesion.
Why Each Item is Important:
- Tile Cutter: Essential for fitting tiles around edges and obstacles.
- Tile Spacers: Ensure consistent grout lines for a professional finish.
- Notched Trowel: Creates ridges in the adhesive for better tile grip.
- Grout Float: Helps fill grout evenly without scratching tiles.
- Spirit Level: Prevents uneven tiles and crooked lines.
- Sponge and Bucket: Necessary for cleaning as you work to prevent adhesive and grout from hardening on the tiles.
- Tape Measure and Pencil: For precise measurements and markings.
- Safety Gear: Protects against cuts and debris.
Infographic: Essential Tools and Materials
Essential Tools and Materials for Tiling
- Tile Cutter: For cutting tiles to size.
- Tile Spacers: Maintain even gaps.
- Notched Trowel: Apply adhesive evenly.
- Grout Float: Spread grout smoothly.
- Spirit Level: Keep tiles aligned.
- Sponge & Bucket: Clean excess grout.
- Safety Gear: Protect hands and eyes.
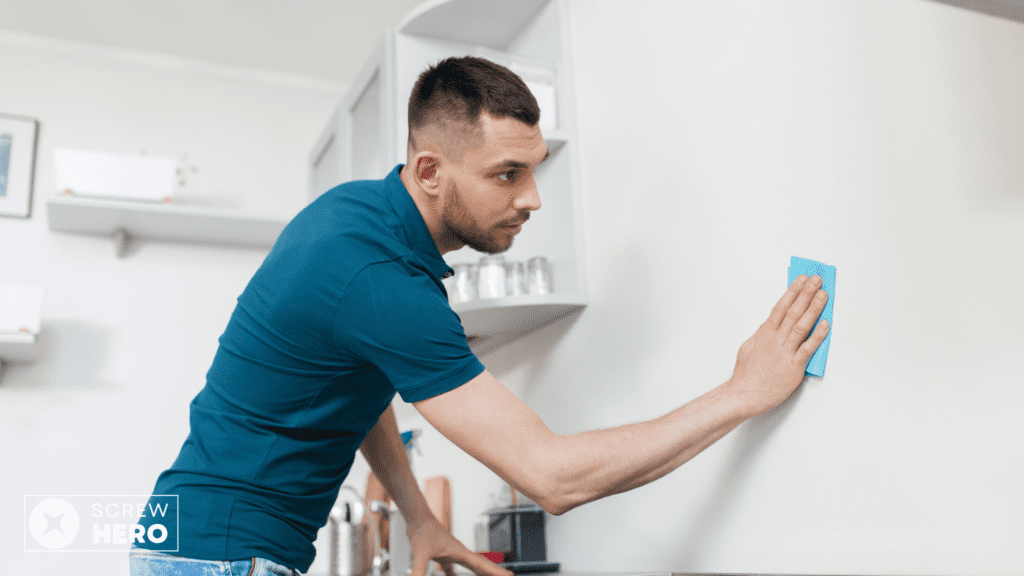
Step 1: Prepare Your Wall Surface
A successful tiling project starts with proper wall preparation. Ensuring your wall is clean, smooth, and dry will help the tiles adhere properly and result in a professional finish.
Key Steps:
- Clean the Wall:
- Use a grease remover or mild detergent to eliminate any grease, dirt, or residue.
- Wipe down with a damp cloth and let it dry completely.
- Repair Imperfections:
- Fill any cracks, holes, or uneven areas with wall filler.
- Sand the surface smoothly once the filler is dry.
- Prime the Wall (if necessary):
- If the wall is porous or freshly plastered, apply a primer to improve adhesion.
- Measure and Mark:
- Measure the area you plan to tile.
- Use a level and pencil to mark the boundaries of the splashback.
Tip: Removing any old tiles? Ensure all old adhesive is scraped off for a smooth surface.
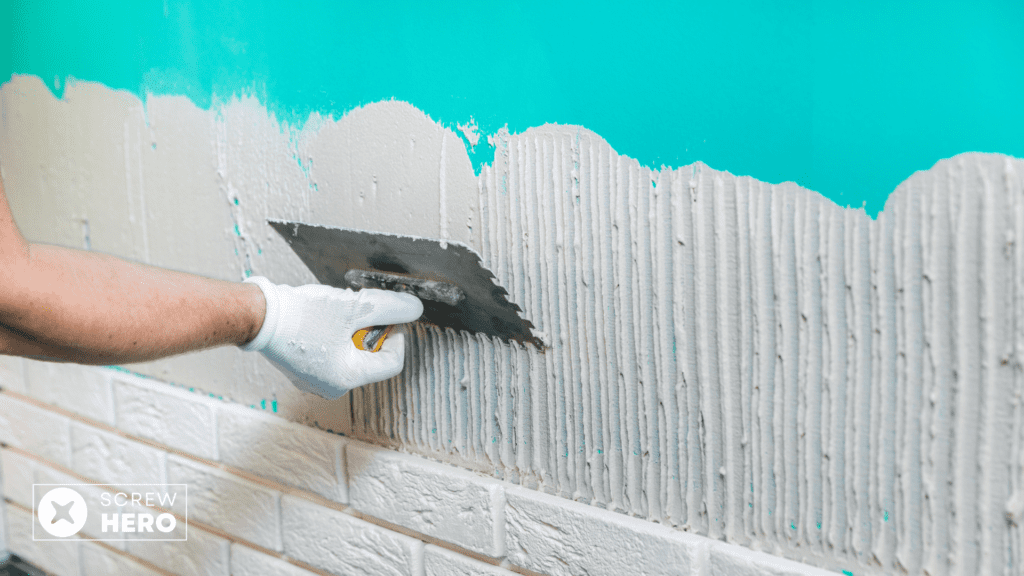
Step 2: Apply Tile Adhesive
Proper application of tile adhesive is crucial for secure and long-lasting tiles.

Key Steps:
- Mix the Adhesive:
- Follow the manufacturer’s instructions to mix the tile adhesive to the right consistency.
- Apply Adhesive to the Wall:
- Start with a small section (about 1 square meter).
- Use the flat side of the notched trowel to spread a thin layer of adhesive onto the wall.
- Create Ridges:
- Hold the notched side of the trowel at a 45-degree angle.
- Comb the adhesive to create even ridges, which help the tiles bond securely.
- Work in Sections:
- Only apply adhesive to areas you can tile within 20-30 minutes to prevent it from drying out.
Tip: Consistent ridges ensure better adhesion and prevent tiles from slipping.
Step 3: Start Laying the Tiles
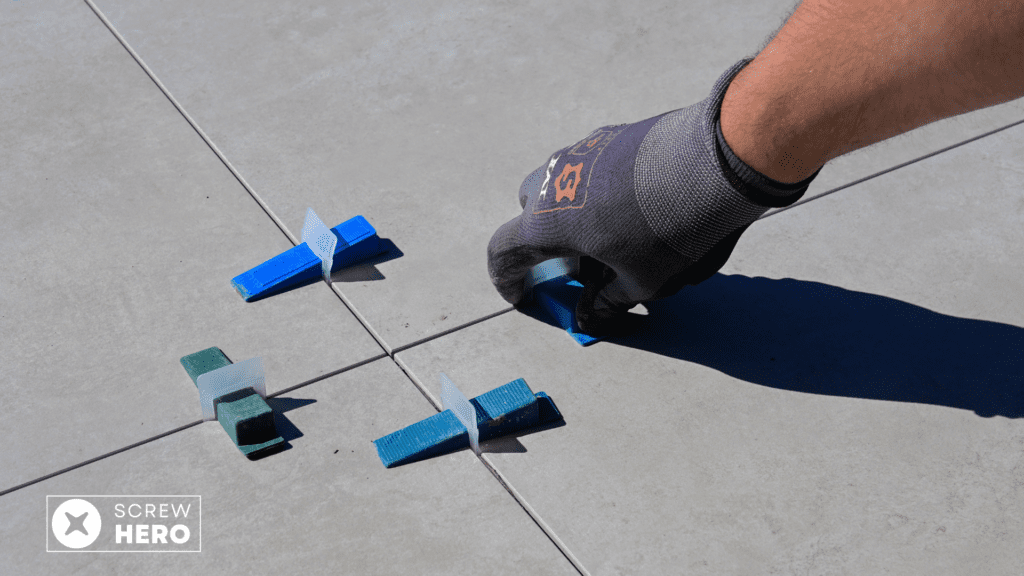
Now comes the exciting part—laying the tiles onto your prepared wall.
Key Steps:
- Begin at the Center:
- Starting from the bottom center allows for a balanced layout.
- Use your previously drawn guidelines.
- Place the First Tile:
- Gently press the tile into the adhesive.
- Twist slightly to ensure a good bond.
- Insert Tile Spacers:
- Place spacers at each corner of the tile to maintain even gaps.
- This ensures uniform grout lines.
- Continue Laying Tiles:
- Work outwards from the first tile.
- Check alignment regularly using the spirit level.
- Adjust tiles as necessary before the adhesive sets.
- Cutting Tiles:
- Measure the space for edge tiles or around obstacles.
- Mark the cut line on the tile with a pencil.
- Use the tile cutter according to the manufacturer’s instructions.
Tip: Wipe off any adhesive that squeezes out between tiles before it dries.

Step 4: Grout the Tiles
Grouting seals the tiles and gives your splashback a polished look.
Key Steps:
- Allow Adhesive to Dry:
- Wait at least 24 hours for the adhesive to set before grouting.
- Remove Tile Spacers:
- Carefully take out all spacers from between the tiles.
- Mix the Grout:
- Follow the manufacturer’s instructions for the correct consistency.
- Apply Grout:
- Use the grout float to spread grout diagonally across the tiles.
- Press firmly to ensure grout fills all gaps.
- Clean Excess Grout:
- Wipe the tiles with a damp sponge to remove surplus grout.
- Rinse the sponge frequently and avoid removing grout from the joints.
- Second Cleaning:
- After 10-15 minutes, wipe the tiles again to remove grout haze.
- Final Touches:
- Use a grout finishing tool or your finger to smooth the grout lines.
Tip: Avoid using too much water when cleaning, as it can weaken the grout.
Step 5: Clean and Finish
Completing the finishing touches ensures your splashback looks immaculate.
Key Steps:
- Allow Grout to Cure:
- Let the grout dry completely, usually 24-48 hours.
- Polish the Tiles:
- Use a soft, dry cloth to buff the tiles and remove any remaining haze.
- Inspect the Grout Lines:
- Check for any gaps or imperfections.
- Touch up areas if necessary.
- Apply Grout Sealer (Optional):
- Protects grout from stains and moisture.
- Follow the product instructions for application.
- Reattach Fixtures:
- If you removed any sockets or fittings, reattach them carefully.
Tip: Regularly clean your splashback with mild detergent to keep it looking new.
Conclusion
Tiling a kitchen splashback is an excellent project for beginners. By following these five easy steps, you can create a stylish and functional space that enhances your kitchen’s overall look. With the right tools, careful preparation, and a little patience, you’ll achieve a professional finish that you can be proud of.
Remember, practice makes perfect. Don’t rush the process, and don’t hesitate to ask for advice from professionals if needed. Happy tiling!
Additional Resources
Looking to renovate more than just your splashback? Check out our bathroom fitters category on ScrewHero for professional services and inspiration.
About the Author
Luke Polach is a seasoned professional with extensive experience in the building industry. He previously ran a successful building business in London, where he worked closely with all kinds of tradespeople, including plumbers, electricians, and carpenters. Recognising the challenges both tradespeople and customers face, Luke is now focused on creating online solutions like ScrewHero and Buildiro.com. These platforms aim to connect homeowners with reliable tradespeople, making it easier to find trusted professionals for any project.